02. Blink Code
Did you know that Arduino UNO board has a inbuilt LED connected to its GPIO 13 pin.
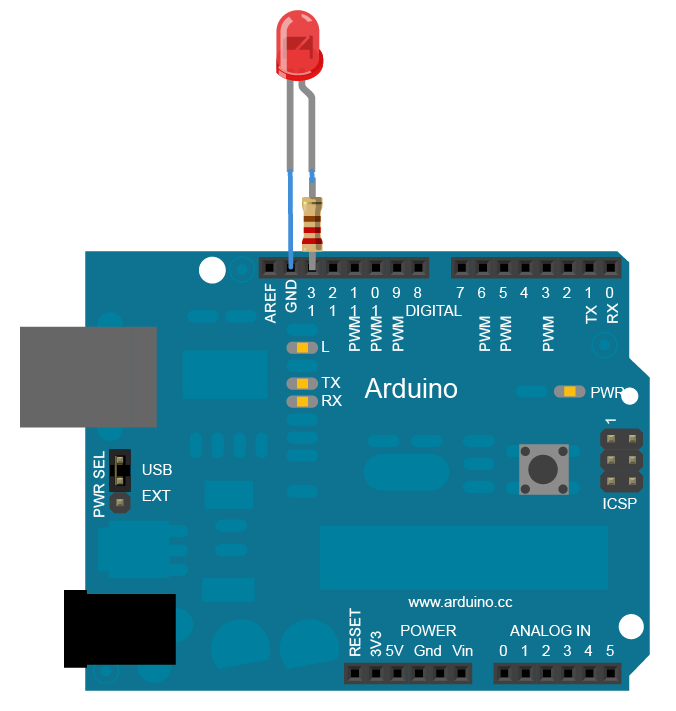
Lets program Arduino to blink that LED, if you wish to connect an external LED,schematics given below:
- Arduino has an extensive set of examples. Go to
Files->Examples->0.1 Basics->Blink
- If your too lazy then just copy paste the code below
//Taken from https://www.arduino.cc/en/Tutorial/Blink

void setup() {
  // initialize digital pin LED_BUILTIN as an output.
  pinMode(LED_BUILTIN, OUTPUT);
}
// the loop function runs over and over again forever
void loop() {
  digitalWrite(LED_BUILTIN, HIGH);   // turn the LED on (HIGH is the voltage level)
  delay(1000);                       // wait for a second
  digitalWrite(LED_BUILTIN, LOW);    // turn the LED off by making the voltage LOW
  delay(1000);                       // wait for a second
}
-
pinMode(pin_number,OUTPUT (or) INPUT)-This function specifies the compiler if the pin number(13 in this case) is going to be used for output or Input (Output for driving LED's).
-
digitalWrite(pin_number,HIGH(or)LOW)- This function writesHIGHorLOWto the pin_number (13 in this case).f the pin has been configured as an OUTPUT with pinMode(), its voltage will be set to the corresponding value:5VforHIGH,0V(ground) forLOW.
-
delay(ms)-Pauses the program for the amount of time (in milliseconds) specified as parameter. (There are 1000 milliseconds in a second.)