Scipion GUIs
This page aims to introduce you in the usage of Scipion GUI. To start
image processing in Scipion we need to run scipion from the command
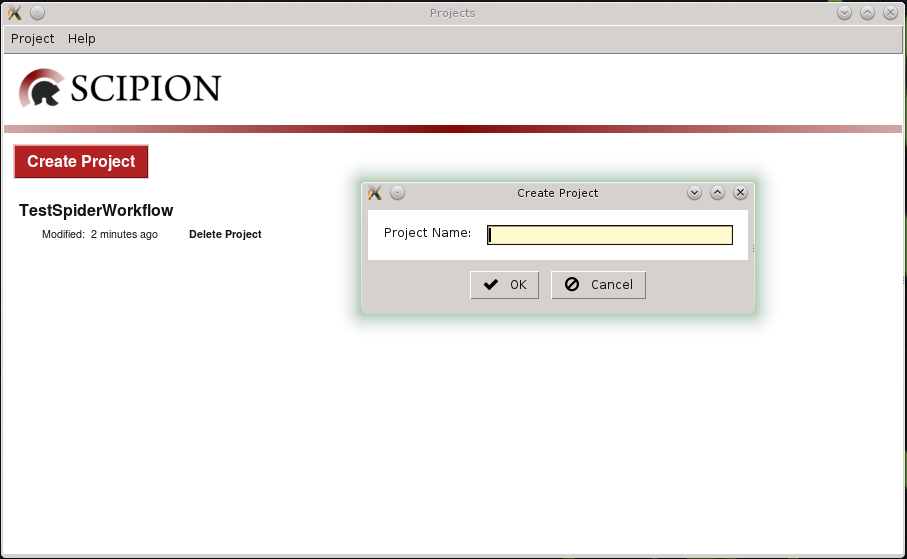
line. At first projects manager is displayed and we can create a new
project or select one previously registered (Fig. 1). For this tutorial
we registered projects TestSpiderWorkflow and TestXmippWorkflow for
illustrative purposes (running scipion tests
tests.em.workflows.test_workflow_spiderMDA and
tests.em.workflows.test_workflow_xmipp).
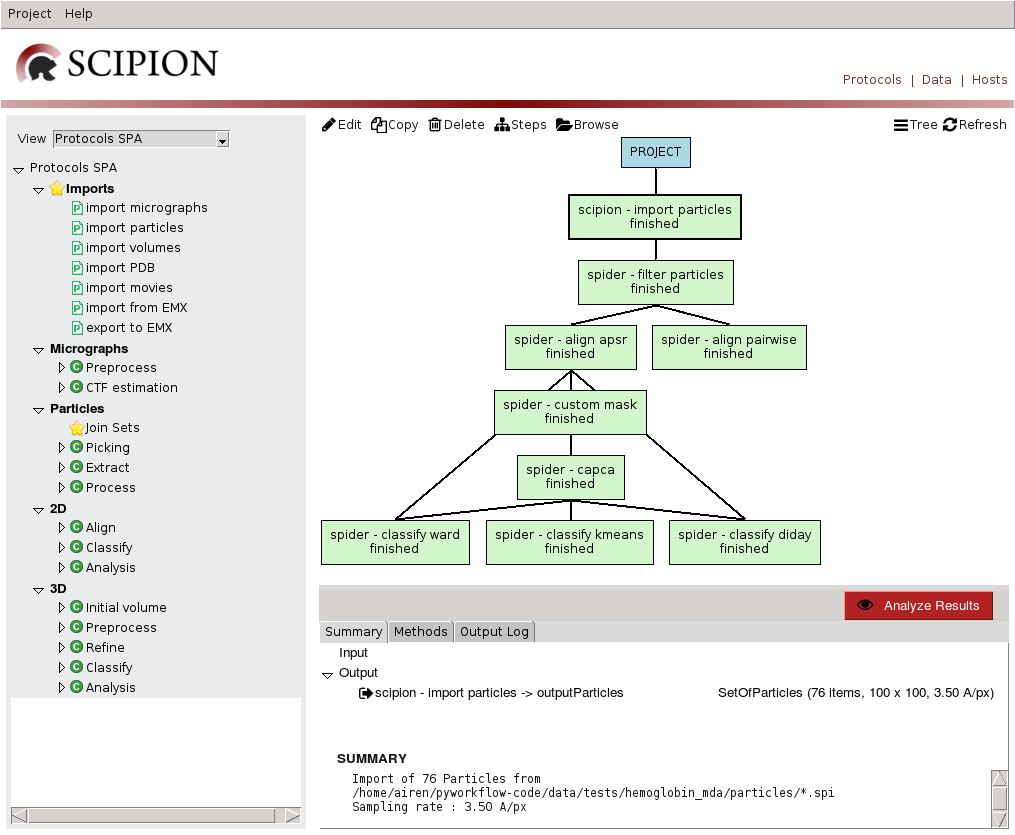
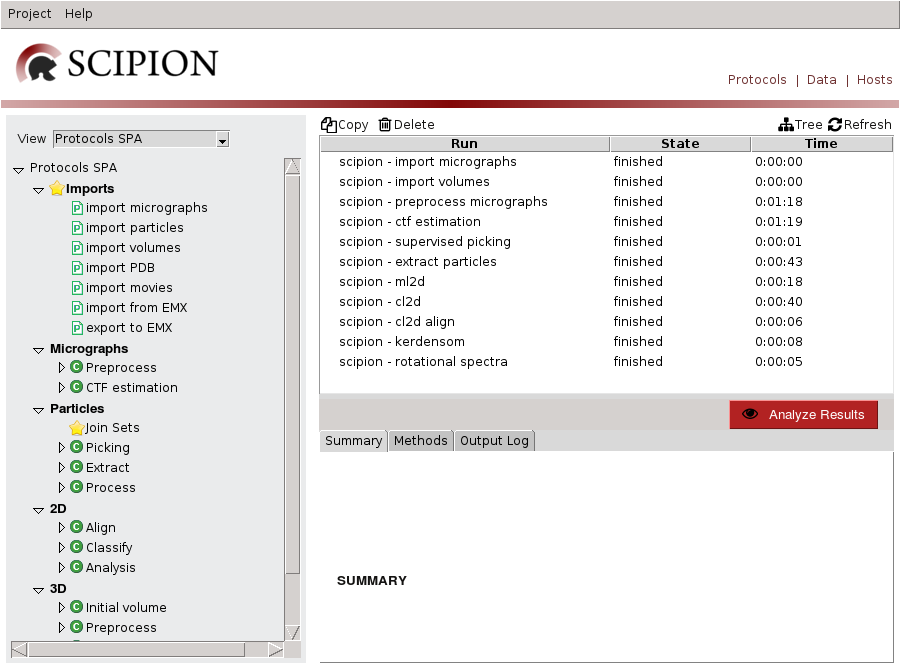
If we open TestSpiderWorkflow project GUI is loaded(Fig 2). To the left different reconstruction tasks related to Single Particle Analysis (SPA) are listed. The tree menu is loaded from a configuration file where protocols are grouped according to base classes, e.g.: Micrographs Preprocess category displays ProtPreprocessMicrographs protocols. A protocol is a processing task that involves the execution of several steps and can be associated to different workflows, e.g.: SPA or Random Conical Tilt (RCT).
To the right the sequence of protocols executed by the user and its state (running, finished, aborted) is listed. We can visualize it using list or tree views. Starting from Scipion version 1.1 it is possible to create labels associated with different protocols. You can find more details here. Also we can edit or copy a protocol (to rerun it), delete it, see steps or access execution database.
Bottom right panel displays information for the selected run, such as inputs and outputs, execution logs or documentation - also provides "Analyze Results" button to visualize outputs.
If we switch to Data mode left panel displays EM objects registered for each type and right panel displays project data tree, with protocol output objects as nodes and edges towards objects used as input. Bottom right panel displays information for the selected item, that can be opened using double click. This mode allows us to track image processing emphasizing on data handling.
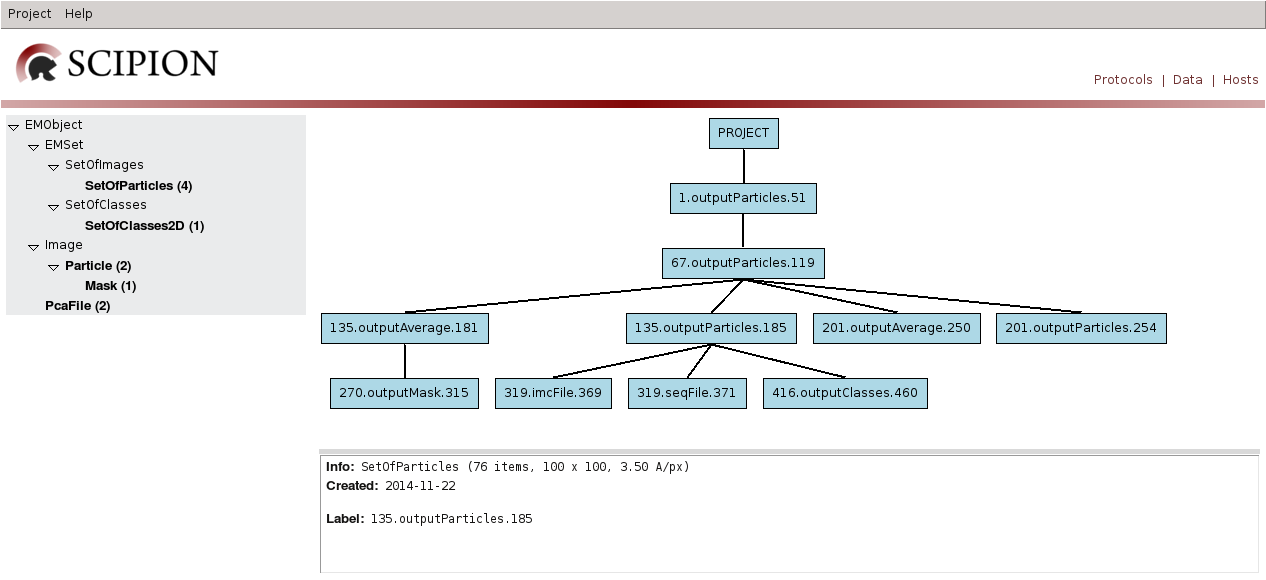
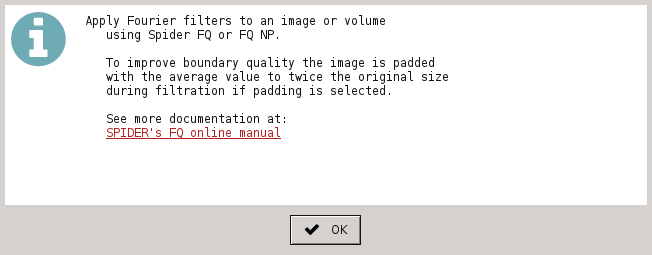
TestSpiderWorkflow project imports a set of particles, preprocess and aligns them to finally use it as input for different 2D classification algorithms. If we open filter particles protocol (using edit) the following form is displayed:
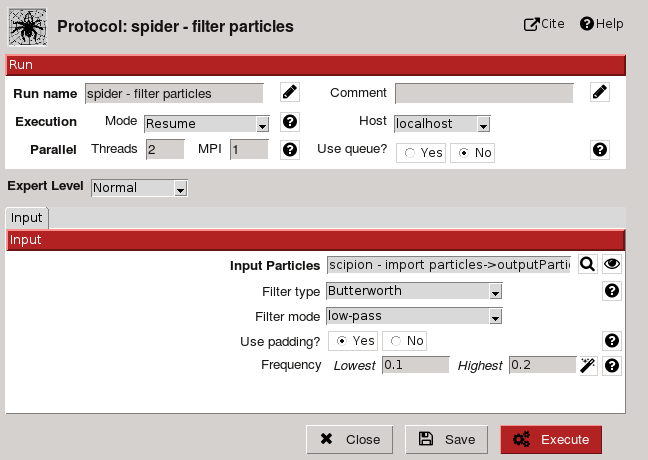
Protocol provides cite references and help util to introduce user on the subject (Fig. 4-5). Form possess two sections: Run and Input. Run section is common to all protocols and allows the user to configure run label and comments (to personalize runs, Fig. 4); execution mode (restart or resume), host, queue and threads or MPI. Many image processing tasks are computer expensive so they need to be run on specific hosts, using queue system and parallel processing. Parallelization can be supported by underneath algorithm or enabled for protocols with independent steps.
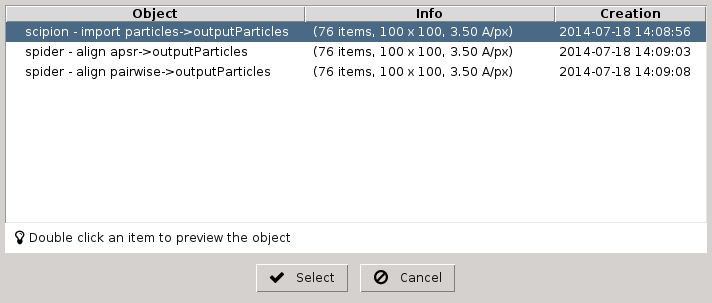
Input section allows to specify input parameters for the task, like input particles or filter type. A brief description is provided for all of them (using help button) and for some a Search GUI to select input object (Fig. 6) or a wizard GUI (through eye button). Parameters are showed considering expert level selected (Normal, Advanced or Expert).

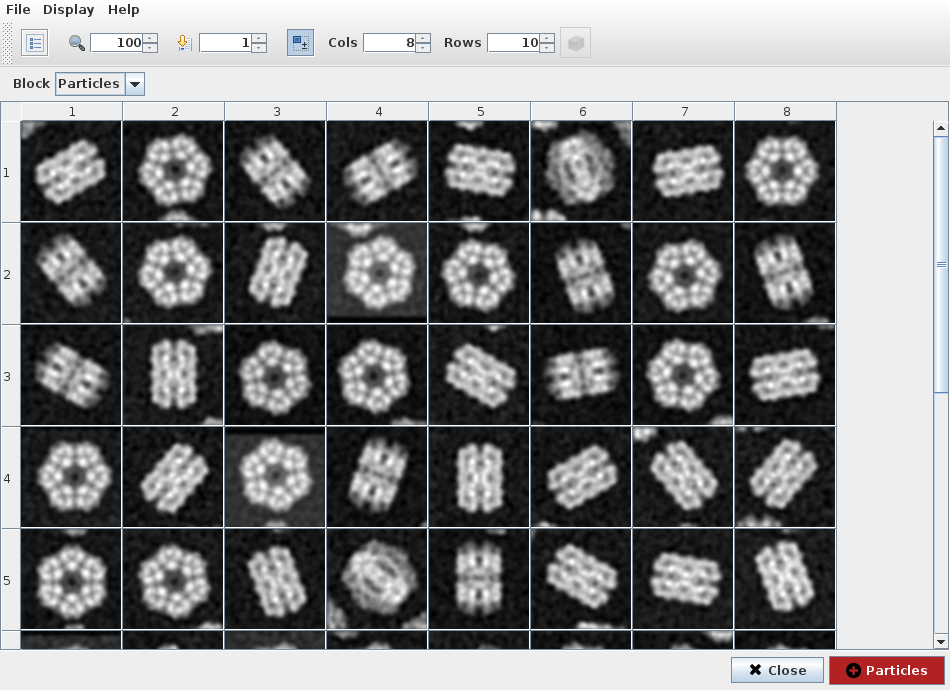
We can visualize filtered particles using "Analyze Results" (Fig. 7). ShowJ viewer is the default viewer for most of Scipion objects, like images, volumes, sets of images, classes, etc. It can display data in gallery and table modes and navigate trough different blocks of data. Also load single images, create subsets, etc. See ShowJ for more detail. In this project we use it to refine output from a 2D classification algorithm.
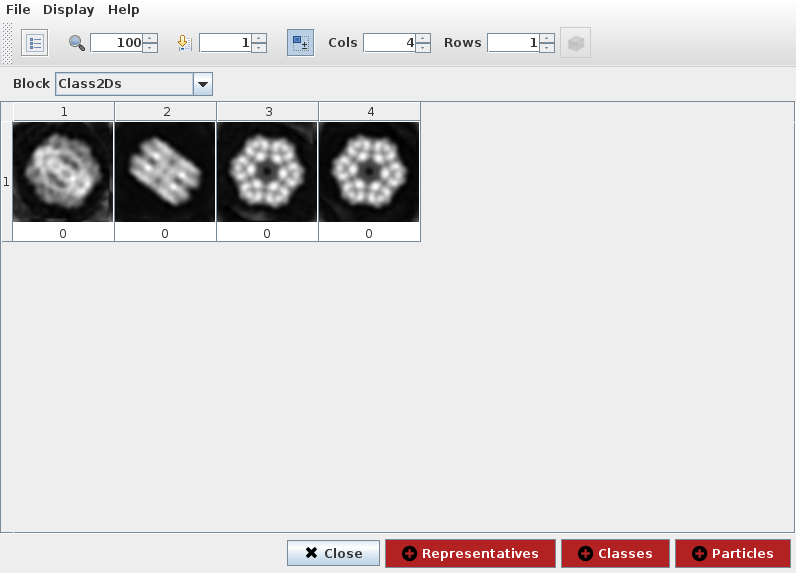
If we select 2D classification protocol spider-classify kmeans and
open output classes, we can see representative particle for each class
(Fig. 8). Third and fourth items seemed very similar so we can disable
fourth item and create a subset containing only remaining classes. This
operation registers a subset protocol with this classes as input and the
set of classes with enabled items as output.
-
Xmipp Workflow*
If you open TestXmippWorkflow the following project GUI is displayed (Fig. 9):
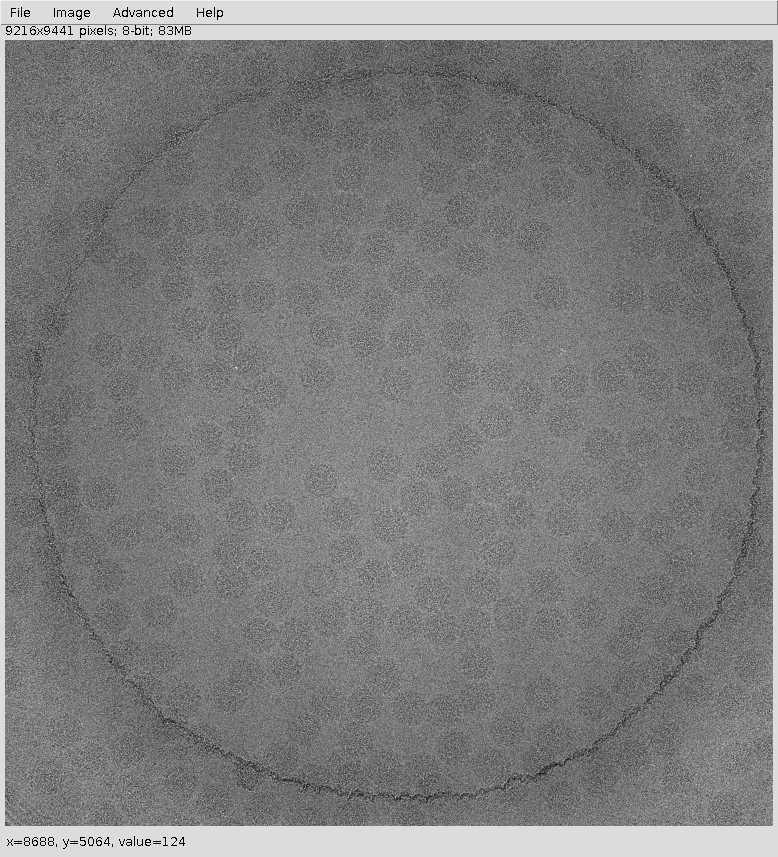
This project imports a set of micrographs (eg: Fig. 10), reduce its image size using downsample and estimates their CTF. Then, picks particles from micrographs and extracts particles to use it as input for alignment and classification algorithms like cl2d, ml2d, kendersom or rotational spectra. We use it to illustrate CTF and particle picking GUIs.
ShowJ GUI for single images is displayed above (see Showj)
Screen micrographs produces this output:
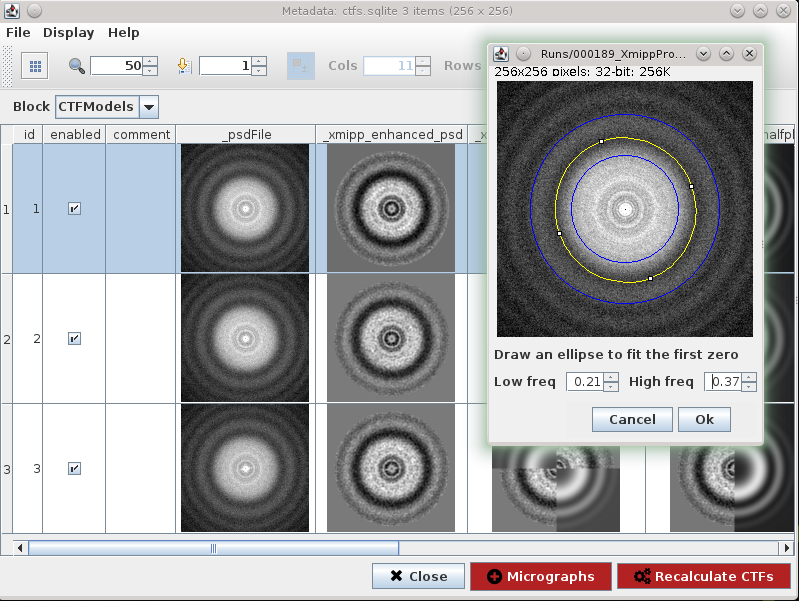
We can use CTF wizard to redefine input parameters to recalculate CTF on specific micrographs. Recalculate CTFs will register a new protocol that receives this SetOfCTF as input and creates an output set with CTFs updated.
Particle picking can be done in Scipion using Xmipp, Eman, Bsoft, etc. In this tutorial we chose Xmipp Particle Picker, see Fig. 12.
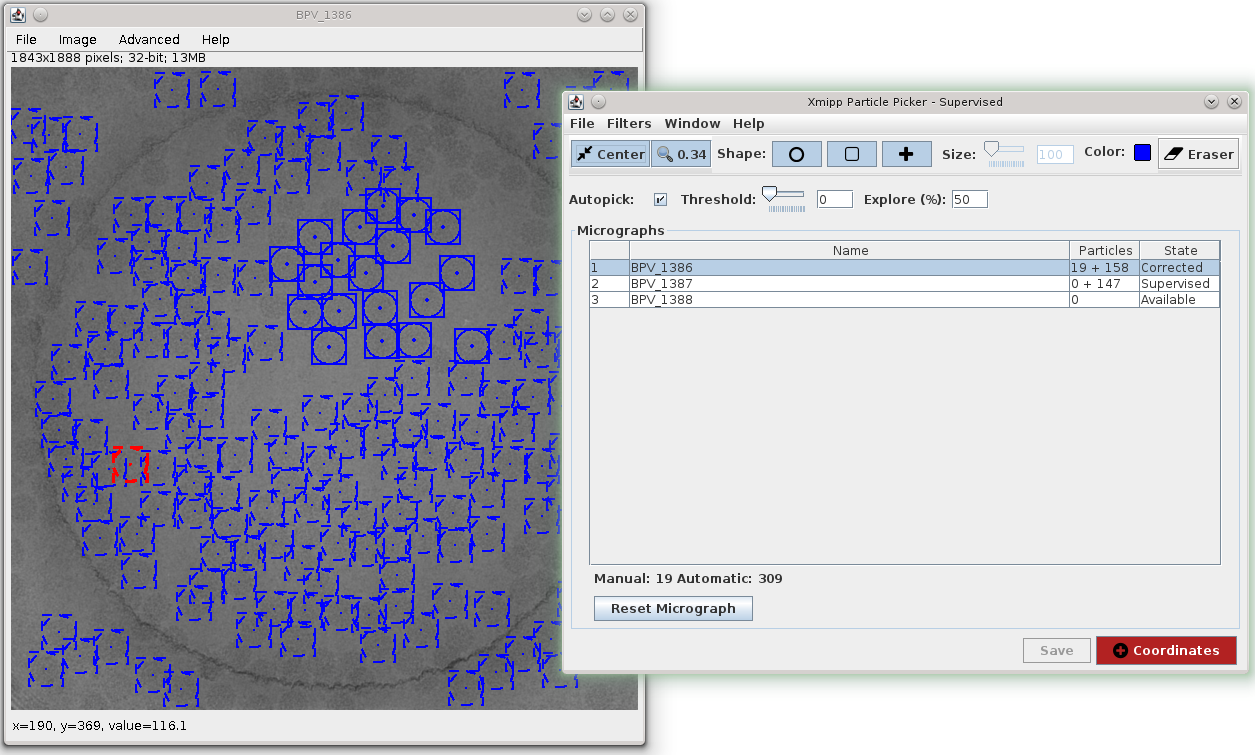
The Xmipp picker allows us to iterate over the micrographs to pick particles, see Xmipp Particle Picker. After we have done some manual/supervised picking and feel confident with the results we register output coordinates into Scipion using Add Coordinates button.